
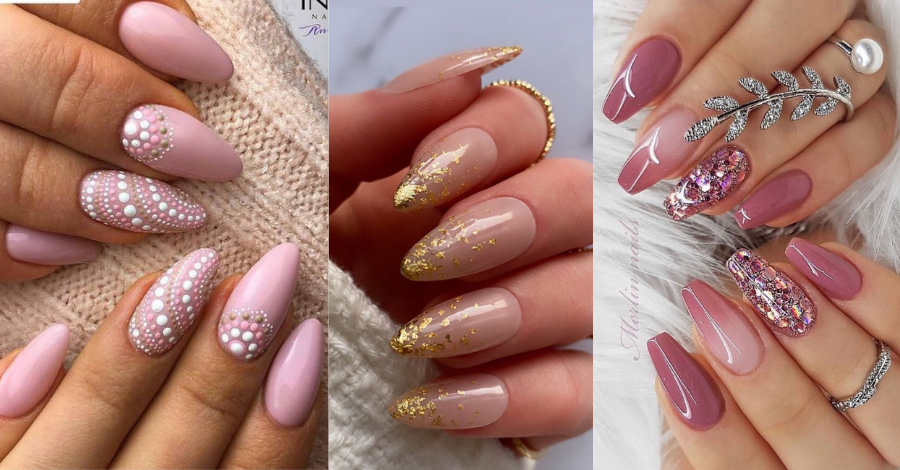
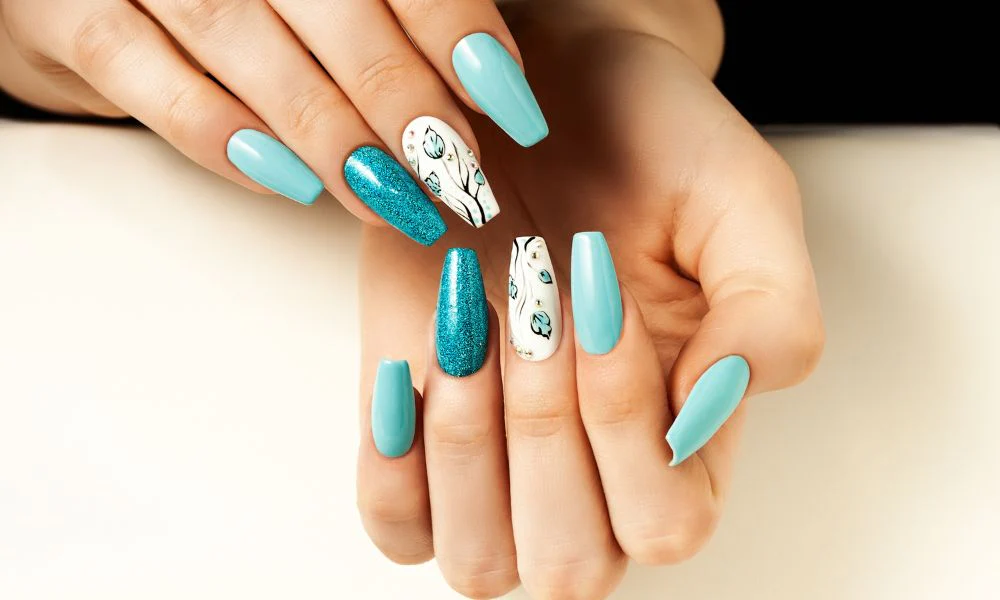
Get Glamorous with these Trendy Nail Extension Designs
Are you ready to get glamorous with the latest nail extension designs? Nail extensions are an easy way to get a stylish, eye-catching look with minimal effort. Whether you’re a beginner or a pro, these trendy nail extension designs will have you looking and feeling your best. From classic French tips to intricate 3D designs, these nail extension tips and design ideas will have your nails looking salon-fresh in no time. So let’s get started and explore the world of nailsextensions!
The Different Types of Nail Extensions
Nail extensions are a great way to add length, shape and design to your nails. Whether you’re looking for something subtle or something more bold, there are plenty of nail extension tips and designs to choose from. Here’s an overview of the different types of nail extensions available:
- Acrylic Nail Extensions: Acrylic nail extensions are made with a combination of liquid monomer and powder polymer. This type of extension provides extra strength and durability compared to other methods, as well as a natural-looking finish.
- Gel Nail Extensions: Gel nail extensions use a similar technique to acrylic but require a different type of product. This type of extension is softer and easier to shape than acrylic, so it’s often used for more intricate designs.
- Fiberglass Nail Extensions: Fiberglass nail extensions are perfect for those who want a lightweight but durable look. The fiberglass is applied to the nail bed, then a liquid resin is applied to harden the fiberglass into place.
- Silk Wrap Nail Extensions: Silk wrap nail extensions are applied using a special adhesive and silk cloth. They provide a smooth, lightweight finish that can last up to six weeks.
By familiarizing yourself with these different types of nail extensions, you can better understand which one may be right for you. Keep in mind that proper application and care are essential for any type of extension to look its best and last.
How to Choose the Right Length
When it comes to nail extension tips, one of the most important things to consider is the length of your extensions. It’s important to select the right length for your nail extension designs that won’t be too long or too short. The general rule of thumb is to go no longer than one millimeter beyond the tip of your natural nail. It’s best to start with a shorter length and then build up to a longer length if desired. To determine the right length, you can use a measuring tool like a ruler or calipers to measure from the end of your natural nail to the desired length of your nail extension.
When choosing a length, keep in mind that short nails may be more appropriate for everyday wear, while longer lengths are better for special occasions and for creating unique designs. If you’re not sure which length to choose, consult with a professional nail technician who can help you decide on the best length for your nail extension tips and designs.
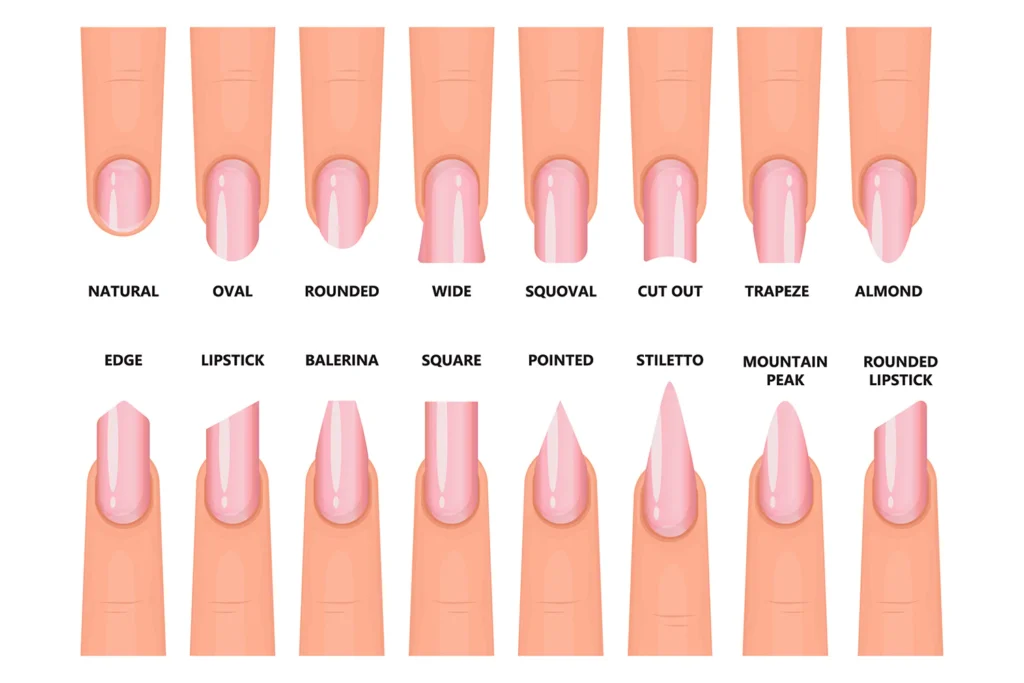
The Different Types of Nail Shapes
The shape of your nails can make a big difference in how they look and the type of nail extensions you choose. There are several different nail shapes you can choose from, each with its own unique look and feel.
Square: A square-shaped nail is one of the most classic and popular shapes. It is also the most natural-looking nail shape and provides a good base for applying any type of nail extension. The square shape gives your nails a neat, clean look.
Round: Round nails provide a softer, more feminine look. This shape is great for shorter nails, as it creates a larger area for extensions to be applied.
Almond: Almond-shaped nails are a modern twist on the classic square shape. They are tapered at the top, creating a beautiful almond shape. This look is perfect for those who want a more elegant or glamorous look.
Coffin: Coffin nails are similar to almond-shaped nails but with a flat tip instead of a tapered one. This look is great for longer nails, as it provides plenty of space for adding length with extensions.
Stiletto: Stiletto nails are pointed at the tip and create an edgy, dramatic look. This shape is not recommended for short nails, as it could be too difficult to work with.
Oval: Oval nails offer the best of both worlds – they combine the clean lines of square nails with the roundness of round nails. This is a great shape for anyone who wants to add length without having too much space to work with.
Tips for Applying Nail Extensions
Applying nail extensions can be a tricky process, but it’s possible to achieve salon-quality results if you take the time to do it properly. Here are a few tips for applying nail extensions that will help you achieve the look you want:
- Before starting, make sure your nails are clean and dry. Any dirt or oils left on the nails can cause your extensions to have an uneven finish or come off prematurely.
- Choose a quality glue specifically designed for nail extensions. Read the label carefully to make sure it is the correct type for your specific type of extension material.
- Begin by applying a thin layer of glue to the underside of the natural nail and then place the extension onto the nail bed. Make sure the extension is completely flush with the nail surface.
- After the extension is in place, press down firmly to ensure it adheres correctly. This will help create a secure bond and prevent any lifting or chipping of the extension.
- Allow the extension to set for at least five minutes before continuing to work on the other nails.
- Once all of your extensions are in place, you can use a nail file to smooth out any rough edges or bumps. You can also use a buffer to buff and shine the extensions to give them a glossy finish.
- Finally, add a top coat to protect your extensions and make them last longer.
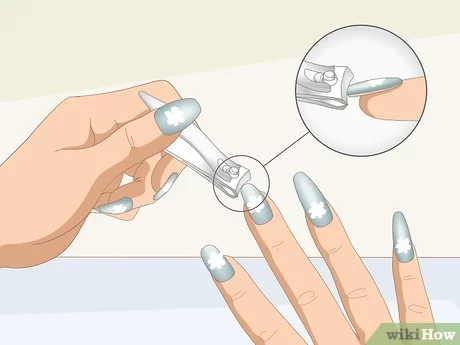
How to Remove Nail Extensions
Removing nail extensions can be tricky and if done improperly, could lead to damage to your natural nails. However, with the right technique and supplies, you can successfully remove nail extensions without any problems.
Before attempting to remove the extensions, it is important to note that there are several different kinds of nail extensions and each type will require a different removal method. For example, acrylic nails require a special chemical remover, while gel nails can be taken off with an acetone-soaked cotton ball or pad.
Once you have identified the type of nail extensions that you have, it’s time to start the removal process. Here are the steps to follow for removing nail extensions:
- Start by soaking your nails in warm water for 10 minutes to soften the adhesive.
- Use an orange stick or a cuticle pusher to gently lift the edge of the nail extension.
- Apply an acetone-based remover to the lifted edge and let it sit for a few minutes.
- Using your orange stick, gently remove the entire extension from your natural nail.
- If there is any residue left behind, use a nail buffer to buff it away.
- Cleanse the area around your nails with a soft cloth and moisturize them with nourishing oil.
Removing your nail extensions can be a simple and easy process if done correctly. With the right tools and supplies, you can ensure that your nails look healthy and strong after the removal process.